Skip to content

Reveal Content When Scrolling – Elementor GSAP Scrolltrigger (No Plugins)

So if you follow along in the video, I refer to this blog post for you to either enter code at certain points into the HTML widget at the bottom or to name the css classes we have to refer to for the code to work.

Alternatively

You can download the complete template here

if you want to use the images I have in the example then click this button
(please do not use in commercial use, these are copyrighted images)

The css names for all the containers are:

The GSAP script used to create the fading image effect on scroll.

How To Created an Animated Mesh Gradient Backgrounds in Elementor (No Plugins)

So if you follow along in the video, I refer to this blog post for you to either enter code at certain points into the Custom CSS option inside the main container, so below is everything you will need!

To create the code to your own mesh design, click this button below to go to CSSHero

The css code used in the Main Container that houses the Custom CSS animation.

This is the animation code, put it into the Custom CSS tab under Advanced Settings of the main container,
remember to give a custom css class to the container you are using this code in.

This is the example I sued exactly in the video, put it into the Custom CSS tab under Advanced Settings of the main container,
remember to give a custom css class to the container you are using this code in.

How To Play Horizontally Scroll Using GSAP ScrollTrigger In Elementor (No Plugins) | WordPress Tutorial

So if you follow along in the video, I refer to this blog post for you to either enter code at certain points into the HTML widget or in the Custom CSS option inside the main container, so below is everything you will need!

Alternatively

You can download the complete template here

The css code used in the Main Container that houses the horizontal inner containers.

This is put into the Custom CSS tab under Advanced Settings of the main container:

The GSAP script used to create the horizontal effect.

PLAY VIDEO ON SCROLL | GSAP Scrolltrigger Elementor Tutorial Using No Paid Plugins
So if you follow along in the video, I refer to this blog post for you to either code code at certain points of show commands or reference files and features to downlaod, so below is everything you will need!

The video I used in the tutorial of the falling fruit is here !

The code used in the html widget under the video:

Second option with PRE-Loading

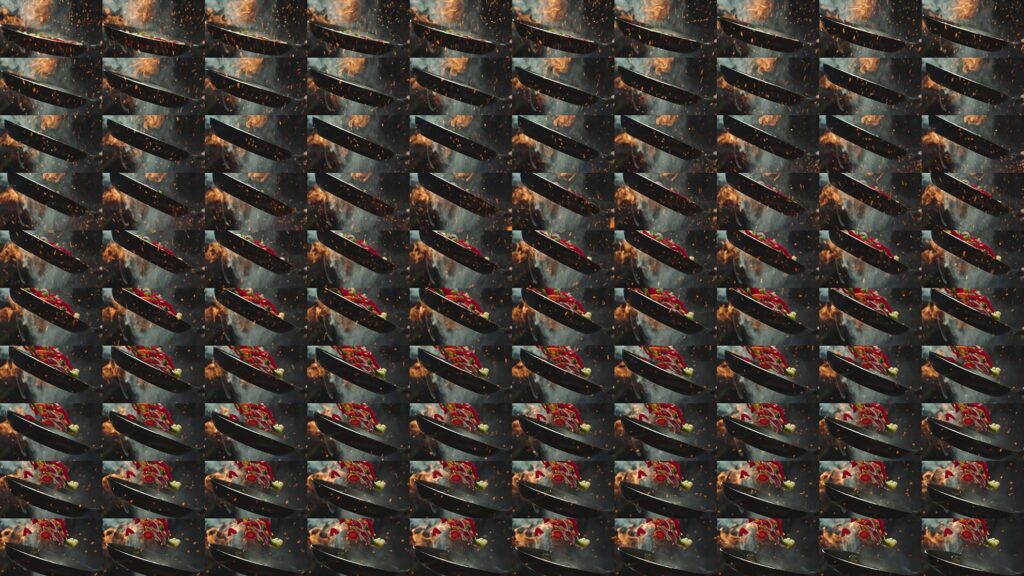
PART 2 : Sprite Sheet

A grid of repeated animation sprite frames showing a cartoon character in a dark pan firing a red flame, with orange sparks flying across the sequence

The Sprite Image I used for the tutorial

The code referenced to put into a HTML Widget in the Elementor page builder:

The code referenced to put into the Custom CSS of the HTML widget in the Elementor page builder:

The code referenced to put into a Custom Code Template in Elementor:

PART 3 : Video Encoding Using FFMPEG

To Download the FFMPEG library to use on your PC click the button below to go directly to the download page of the official FFMPEG Page

The FFMPEG Command I used in the Command Prompt to encode the video used into the format needed: 

PART 4 : Creating a sprite sheet using FFMEPG

To create a sprite sheet of a video, we first have to create an array of images cut from the video, the FFMPRG Command is :
(Change the scale and FPS as needed, this is just the example I used in the tutorial, not the best for real world deployment.)

To create a sprite sheet of a video FROM the generated image array, the command to use is:
(30 is how many columns and N is automatic for how many rows, not the best for the real world but fine in the tutorial to show how to do it.)
This file will be big, buddy, hence using the plugin shown in the tutorial on how to bypass the scaling issue in WordPress 

Using a PHP Code snippet to insert a Google Tag

In this video I created on YouTube (https://www.youtube.com/watch?v=BX-rrmJhUgU), I showed 5 different methods how to install the Google Tag into your WordPress website.

One of which is using a piece of PHP Code to install it directly into your site.

Unfortunately, YouTube didn’t allow me to paste the code into the description as it doesn’t allow the symbol < or > in the description so I made this blog post to paste the example code for anyone who might need the code example.

Without further ado !

//Add Google Tag To my Website
Function my_google_tag_code(){ ?>


/* Put you Google Tag Here !! */


<?php
}
Add_action ( ‘wp_head’ , ’my_google_tag_code’ , 10 );

Enjoy!!

Night Owl

This is me, late at night. I seem to do some of my best work when the world is quiet and my mind can run freely.

I’ve always been into tech. From a very young age I was taking apart appliances, programming games and generally driving my parents crazy with my inquisitive mind. I’ve also always been a creative. I was that kid in class who was doodling and coming up with cartoon characters.

Fast forward to now, and I get to combine my creativity with my skills in tech and development! What more could I ask for??

When I design websites for clients, I channel their energy and goals and use those to create a one-of-a-kind site for each one. For me, the moment when a site is done is like handing over a piece of art. Each element of the design and each technical aspect have been lovingly and carefully added and tested (sometimes at length) to make sure that the end result is perfect.

Being able to say that I built Reboot from scratch, and looking at the family of clients I have made over the years is something I will always be super proud of.

Yes, the nights get long sometimes, but knowing that I’m providing a great service, using some of my greatest talents, is all the motivation I need to keep on pushing.

www.rebootwebsites.co.za

#rebootwebsites #webdesign #developer #webdevelopment #ecommerce #ecommercesite #wordpress #business #businesswebsite #websitepackages #goodwebdesign #bestwebsites #miguelcarneiro

Mini-Byte with Miguel: CEO of Reboot Websites

It’s not often we get to chat to Miguel as he is usually behind a screen, so we jumped at the opportunity to get a little “byte” of an interview with him. Meet the man behind the epic brand that is Reboot Websites!

Q: Favorite piece of tech at the moment?

A: Favorite tech has been and will always be the PC. Nothing as versatile and adaptable exists ..yet.. until that day the PC will remain the best tech for me.. From production environments to watching movies to website development .. It just does anything and everything..

Q: Favorite thing to work on when creating websites?

A: Favourite thing to work on would have to be the finishing touches .. its the, stand back and admire our creation moment ..

Q: Most challenging part of creating websites?

A: Most challenging moments depend on the project. For Business Websites , it’s the initial design concept to embody the company, or the colours used, or the animations utilized and page layouts..
For ecommerce websites, the challenges range from design to functionality of the products being sold because the variety is pretty huge in most cases so the website needs to cater for these.. That is a pretty difficult task to pull off without issues and to maintain a seamless design between products and the website as a whole..

Q: Who are you following on YouTube ? (Tech/IT/web related)

A: I dont follow anyone in development but as for IT, it’s Linus Tech Tips & Jays 2 Cents..

Q: Who is a dream client for you?

A: A dream client.. umm…… I think the ones that know what they want for a website and its functions overall and trust us in the design .. We always over deliver on each project and service but it helps when the client knows what he is looking for !

And there you have it! An inside scoop on the genius behind the scenes!

Why you need to think about your website design BEFORE the new year

We  get it…. You’re tired.  It’s been a long, hard year and the last thing on your mind is your website design.  But we are going to give you 5 reasons to jump right into it and get the website you’ve been dreaming of… NOW. 

1. You need to be on Santa’s ‘Nice’ list!

Putting off for tomorrow what can be done today is a sure way to get your name on the naughty list.  Instead of being rewarded with a lump of coal, why not get your ideas out there and be rewarded with a stunning, custom-made website design instead!

2. Beat your competitors!

Yup, you’re tired, but so are THEY!  Now is your chance to go full steam ahead and get your website up and running while they rest.  You will thank yourself in the new year when your business, and Reboot Websites’ elves, have been working for you over the festive season.

3. Christmas Specials!

Going ahead with your new website or new business idea, and creating a website now, means you can offer Christmas specials… Like your own little Christmas miracle. (And who doesn’t love those??)

4. You owe it to yourself!

A Christmas gift from you, to you.  That’s right.  A website for your business, blog, or whatever has been burning with passion in your heart and mind, is most definitely a gift that will keep on giving!  We will work on your website design with you, to make sure that you are 100% happy with your special gift to yourself… and your customers!

5. You don’t have to do any work!

This is the best one of all!  You don’t have to do any of the work on this one!  Send us your info, and we will make your website design specifically for you, to your exact requirements, and throw in flair, creativity and SEO optimization with the package!  We will also be available to you, day and night, for your questions and advice.  Now that’s an exciting year-end project to take on… Pretty much hands-free!

We are also pretty much cost-free!! From R399 per month, our website packages pack a punch almost as good as your year-end office party’s.  You get a custom made site, no lump sum to pay in the beginning, and a dedicated website designer on hand 24/7!

You know you want this.   You know you need this.  And you know you need to get this done before the slump of January, when all you will be able to think about will be the sea air and how long your tan (and last few Rands) might last!!

Get in touch with us TODAY!

Join our Online family

How to Write Excellent Website Content

The overall design of a website will influence a visitor’s split-second decision whether to stay or leave a particular URL. Design includes items such as the layout, font style and color, as well as the choice of graphics and pictures. However, once the visitor is drawn in by the design, the quality of a site’s written text will have a lasting effect on both whether a visitor will remain for a longer period of time, as well as whether or not the visitor will return sometime in the future. For this reason, with the exception of basic site design, nothing impacts the quality of a website more than its written text. Ensuring that great text is written is therefore a critical step that requires a structured approach to accomplish efficiently. 

The Basics

Most readers will know that high quality text employs proper grammar and is void of spelling errors. It is also well known that website writing must be concise, should be in an active rather than a passive voice, and use sub-headlines and bolding effectively to help the reader scan material. This is stating the obvious. The real question is how to actually create superbly crafted content from a blank screen and a blinking cursor.

Website Writing in 5 Phases

When attempting to write excellent website text, it is best to keep in mind that all web writing goes through 5 specific and discreet steps or phases. These are 

1) creating an overall plan, 

2) writing an outline, 

3) composing a rough draft, 

4) revising the draft and finally 

5) proof-reading.

Step 1 | Creating an Overall Plan

The key to any design process whether graphics or text, is to have a clear plan. In the case of writing, the planning phase includes each person in the writing team discussing and agreeing upon key points. To use a website design parallel, this can be thought of as a brainstorming session from which a statement of work (SOW) will emerge. The typical questions that are answered in this phase include making content decisions, determining who the main audience will be, and putting together a timeline.

It will also include determining how long each section, including articles, should be. For example, a home page might be written in short paragraphs, single teaser sentences, or even bullet points. The secondary and tertiary pages however will probably be somewhat longer and more detailed. All this has to be planned out in advance.

Some time should also be set aside in this step towards coordinating with the website designers to ensure that there is alignment between the graphic designers and the writers. This is particularly important on the homepage as it is the page that will have the largest impact on bounce rate.

Step 2 | Writing An Outline

Once the project is properly planned, an outline can be completed. An outline is a list of the key points that will be made in each section or page of the site. Bullet points are certainly appropriate here as the goal in this phase is to get a general outline of the text. For longer passages or individual articles, the outline should be structured as an introduction, a main body, and a conclusion. This is a fundamental writing technique, but one that is all too often forgotten. It is surprising how many website articles do not follow this formula.

Step 3 | Composing a Rough Draft

The rough draft is the first time that full and complete sentences are put together. The most important thing to mention with regards to the rough draft is that the better the outline is, the faster the rough draft will be written and usually, the better its quality will be. If multiple individuals are writing the rough draft, it is usually a good idea to assign a single individual with the responsibility of pulling all the content together. In addition to the mundane tasks of formatting the text into a single coherent document, this individual can also be tasked with comparing the draft with the outline to make sure that nothing is accidently missed.

Step 4 | Revising the Draft

Nobody writes a perfect text after only a single draft. All text should be revised until it meets the quality requirements of the website’s owner. Indeed, even Pulitzer Prize winners revise their work. Any written text, even the one you are reading right now, requires revision to make sure that it is perfect and includes the intended content.

Revision includes checking for proper content, verifying spelling and grammar, examining the style, and reviewing references if applicable. There are several tricks to revision. For example, reading the text backwards is an effective method to finding spelling mistakes. Another tip is to read the text out loud. By reading it out loud, a reader can often pick out awkward passages and improve upon them. A third trick is to put the text down for a few hours, or even overnight. Often looking at a text with fresh eyes will allow the proof-reader to find additional mistakes.

If deleting any text, especially large sections, it is recommend that this information be saved in a separate file. One never knows when a piece of deleted text might come in handy for future work.

Step 5 | Proof Reading

Finally, the written text goes into a final revision or a proof-reading stage. Here every last detail is double checked for items such as accuracy, formatting and styling. This person fills the role of editor and does not necessarily have to be the person who completed the draft revision step. In fact, it can often be helpful if this is a different person with fresh eyes. Also, the same document can be proof-read by several people.

To review, the real secret of great website writing is to have a clear and systematic process. This provides structure and allows the project manager to measure how the team is performing vis a vis a schedule. If each step of the writing process is completed thoroughly, the final product will be of high quality and be achieved in a relatively short amount of time.

Join our Online family

Our Christmas gift to you: 3 Magic Principles for designing a website

Your website is your storefront… The shop window that makes people look, and come inside.  It’s important to make it flashy, neat and enticing, to draw the right people to your business.  We know that Christmas is coming, and the season is filled with love and magic, so today, we have decided to get in the spirit, and give you an early Christmas gift!  Just like in a cheesy Hallmark Christmas movie, where the shop windows glisten with Christmas magic, romance blossoms as the employees decorate it, and crowds of happy shoppers flock to see it…. my gift to you this festive season is your very own magic…. 3 magic Principles to design the perfect website!  (romance not included.)

Now let’s unwrap this gift!  Your 3 magic design Principles are:

  1. The Home Page De-Clutter:

The Nielsen Norman Group released a stat in 2011.  It explained  that people looking at things online typically stay for 10- 20 seconds before they move on the next shiny thing.  10-20 SECONDS!! That’s all you have!  In those few seconds you need to grab their attention, and make them want to see more!

By keeping your home page clean and clear, you will allow the distracted visitor to see exactly what is on offer and make their decisions about leaving or seeing more.

Keep your design minimalistic and concise and you won’t look back.


  1. The Hansel and Gretel Approach:

What would the festive season be, without some fairytales?  This time, Hansel and Gretel can teach us a thing or two, not only about the danger of eating too many sweets, but also about web design!

In this approach, we use a hierarchy of information to leave breadcrumbs for the site visitor to follow.  That means that we put the most important information at the top, the second most important information underneath it, and so on to the bottom of the page. The page will read like a story of it’s own and viewers  are more likely to find their happy ending, as they click “BUY” or “CONTACT”!  (Sounds like a great ending to me!)


  1. Keep it Simple:

Your website needs content, and you need to keep it up-to-date.  But having posts that are too difficult to read or understand could actually lose you customers.  Think of it like a Christmas stocking.  Too many brightly coloured toys stuffed into one stocking result in most, or all, of them being overlooked.  Place a few strategic, quality items that you know will be a hit and they will be used and loved for months and years.

Use this Principle when creating your content.  Keep it simple, clear and use strategic keywords to draw the right kind of audience to your site.

This Christmas, put the cheer into your website, and make it a winner.  Your work will pay off over time, as the 3 magic Principles you use, create a site that is pleasing to look at, easy to use and a pleasure to read.

Want help?   We can refurbish or re-make your site for you!

We also offer content creation and online marketing!

Contact us today to get started!